Sunday 31 August 2014

Fusion challenge and a farewell...

Hi everyone!

It's me again! I'm a bit late with this post as I have been travelling and couldn't schedule it.

I feel so sad to be writing this post as this is the last post for my dear team 'Fusion Card Challenge'.

I've immensely enjoyed being a part of this awesomely talented team. Each and everyone of them has been very friendly and supportive. Fusion will always remain pretty close to my heart.

Thanks so much Leslie for coming up with such an awesome challenge and for being a super sweet boss! :)

Thanks to each and everyone on the team for making this journey a memorable one for me. Wish you all the best!

Now coming to the challenge... here's the inspiration picture and sketch.


I based my card on the inspiration picture.


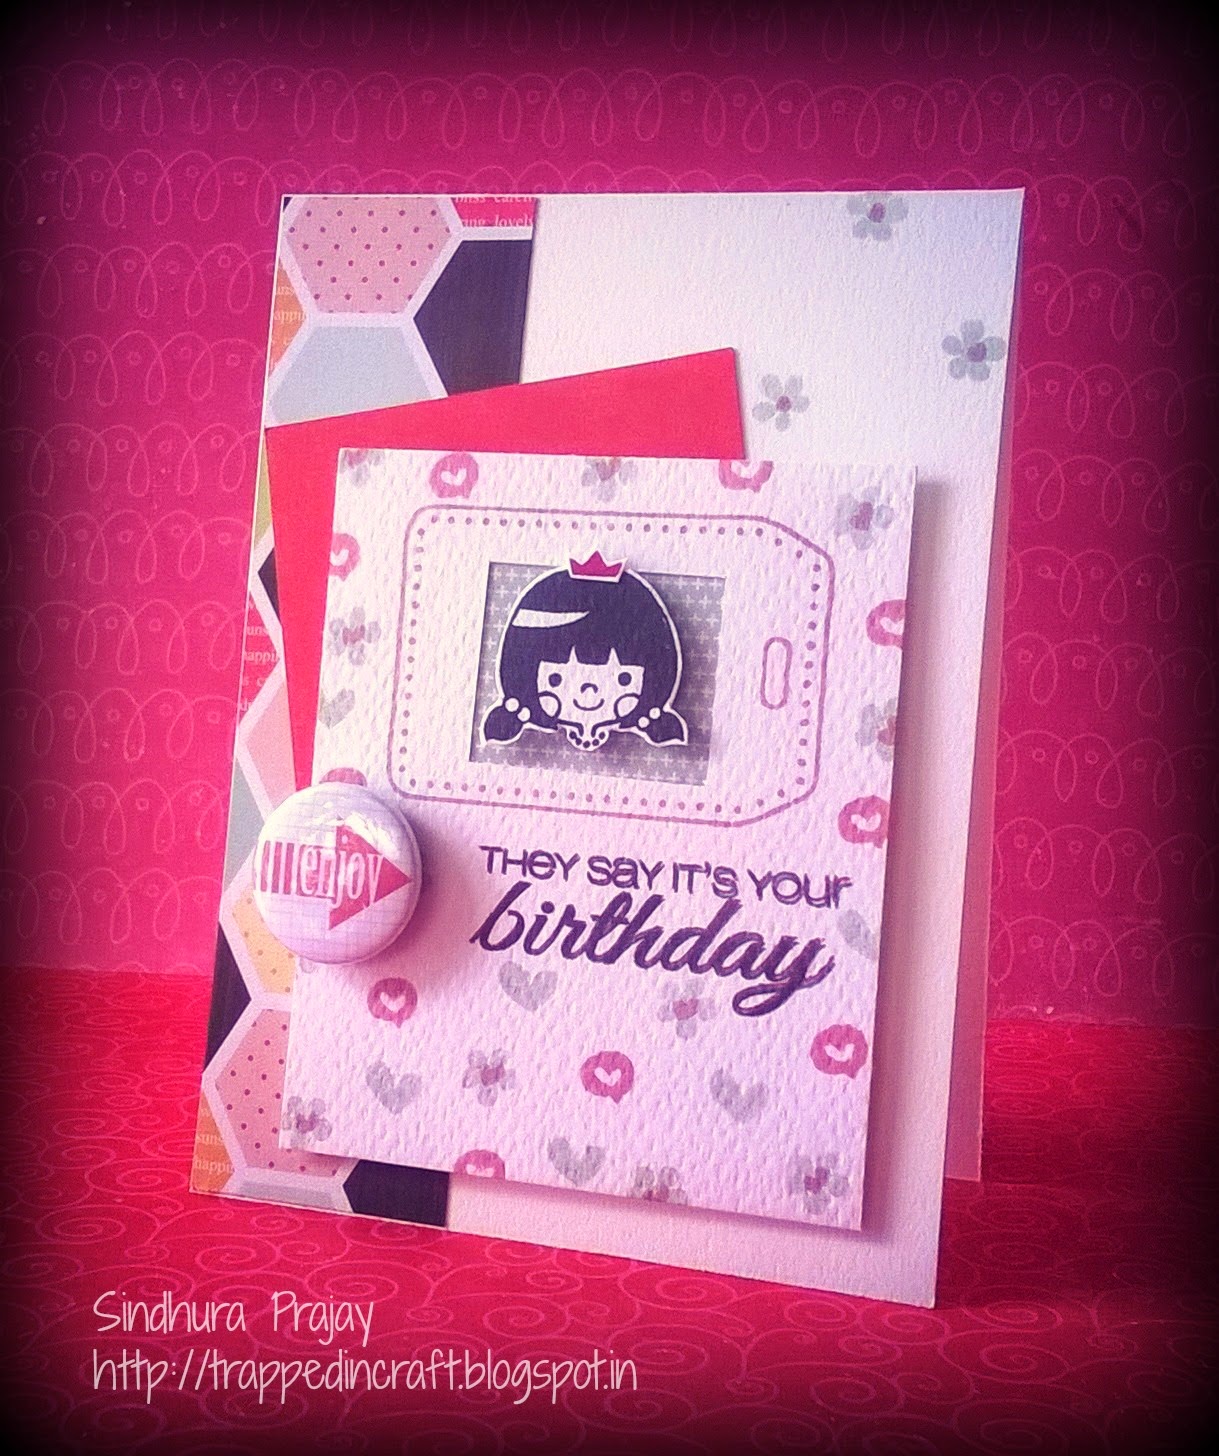
To make this card, I first inked the Hero Arts 'envelope pattern' background stamp in Vintage photo and Weathered wood distress inks . I die cut the letters from My Favorite Things Uppercase alpha die set, colored them with Gelatos and applied wink of stella. After it's completely dry, coated them with generous amounts of glossy accents and let it dry. Assembled the word and stamped the sentiment from Inspired by Stamping. Stamped those stars from Paper smooches.

So..that is all from me... see you soon!

Bows tutorial with MFT 'Dainty bows' die set

Happy Sunday everyone!l!

I shared a tutorial on Crafters Corner blog recently and thought I would share it here as well... It's a fun tutorial on how to make different kinds of bows with My Favorite Things Dainty Bows die set.

I love this die set as there are so many possibilities with it. You could make many types of bows and I'm going to show you four different kinds of them and also the assembling of the basic bow.

Let us start with the assembling of the bow...

Please click on the pictures to read all instructions...


I am not good with words and names, So I have no idea what to call these bows... First I thought I'd say 'Type 1 bow, type 2 etc. but I realized that it would be super boring! So I decided to name them even if the names don't fit!

So here is the first one.

The double bow- 


The layered bow-


The criss-cross bow- (Ahem! Sorry for the weird name!)


The triple layered bow-


Hope you'll  give them a try. 

Thanks for visiting! See you soon!

Sunday 24 August 2014

How have you all bean?! :)

Hey!

I'm happy I'm back to playing along challenges even though it's just or two. :)

I liked the CASology Cue word this time which happens to be 'Java'.

http://casology.blogspot.in/2014/08/week-109-java.html

Here's what I made. 


Lot of glitter and gloss.


I LOVE this cute image from Fiskars stamp set. I don't remember its name.

See you soon!

Tuesday 19 August 2014

happy birthday cutie face!

Hi everybody!

I'm sorry I'm late with this post! The is a brand new challenge live on 'Fusion Card Challenge' blog and here's the sketch and inspiration picture for you to play with.


I played with the sketch. I LOVE Fusion sketches! The sentiment is CAS-ual Fridays stamps 'Bold Wishes' set and the pretty little flowers, heart and the cutie face are from Neat and Tangled 'Gifts for you' stamp set.


You could obviously see that I was trying photo editing! Bokeh effect always fascinates me and since I can't achieve that while photographing project itself, I added it in an editor! I LOVE Picmonkey!!


I hope you join us in our on-going challenge on Fusion Card Challenge blog. see you there!

Sunday 17 August 2014

Wait for it!!

Happy Sunday everyone!!

I have few cards to share that I made with CAS-ual Fridays 'Wait for it'  stamp set.I made three cards with the same stamp set and planning to make more! I just love the big, bold and super fun sentiments.

I hope you like them. 

Submitting the first card to CAS-ual Fridays challenge (I chose the second column and third row.)


I started with heat embossing the sentiment 'Brilliant' in clear embossing powder. Sprayed lots of water on the embossed sentiment and with paint brush let the colours blend in the water to create a water color washed look. After it's completely dry, I then stamped the 'totally' in weathered wood (a shade of grey) twice. I felt the dark grey dominated the colors around the focal sentiment. So I added a strip of vellum to tone down the grey color.

Then, heat embossed 'you are' on a small piece of black card stock in white and finished the card with a twine bow and rhine stones...


I love the way the second card turned out...will do a small tutorial on how I did this...


And the last one... I like the water color look of the sentiments. Inked the sentiments with two different colored distress inks each time and sprayed water and stamped on to strips of water color paper.


Thanks for visiting! See you soon!

Saturday 16 August 2014

Let your dreams take flight.... ABNH challenge.

Hey everyone!

We have a new challenge at 'A Blog Named Hero' and here is the challenge theme...


http://ablognamedhero.blogspot.in/


We are collaborating with 'Reverse Confetti' this month and I used a sentiment from 'Paper Crane' stamp set from their store. I also used Hero Arts circles, feathers stamp sets.


Here's what I made-

As always we're sponsored by the awesome-


I hope you'll join us...

Submitting this card to CAS-ual Fridays challenge (chose first row and the one across (dots, white and sequins)))


Supply list


Tuesday 12 August 2014

Stinkin' cute!

Hey!

Hope everyone is doing well and enjoying the monsoon... Here at my place, we still are waiting to be blessed with rains! Feels like summer hasn't gone yet.

Coming to this post, I recently bought some Simon Says Stamp stuff and I couldn't wait to make some cards...

Here they are...

I kept them very simple to make the images take the center stage.

For my first card, I sponged some shabby shutters distress ink on the card base (4''x4'') and doodled some flowers with my white gel pen. Stamped the sentiment with Ranger Jet black Archival ink. stamped some dots from 'Best fishes' stamp set with Picked Raspberry distress ink (third generation stamping).

On a piece of watercolor card stock, I stamped the image of the adorable princess from the 'Princess' stamp set and tried my best to make her look pretty. :) I added Wink of Stella on her gown to make it shine.


The next card is pretty straight forward. Used the 'Stinkin' Cute' stamp setI just wanted to highlight the adorable image. I stamped the image on a water color paper, colored with distress inks and fussy cut it out. On the base card, I sponged some distress ink a and stuck the image. I stamped circles that are quite inconspicuous. I finished the card with the sentiments.


Submitting the first two cards to Kraft Zone challenge which is CAS cards.

As soon as I saw the fish bowl stamp in the 'Best fishes' stamp set, I knew I wanted to make a shaped card. 

I stamped the fish bowl on a scored and folded card in such a way that the upper border of the image aligns with the top fold of the card. I hand cut the shape and the base was ready.
Then using the Memory Box 'Waves' stencil, inked with tumbled glass and chipped sapphire inks very lightly


Here is how it opens (Sorry for the bad angle of the picture. It was the best I could do to show it... :))


Submitting all these cards to Simon Says stamp Wednesday Challenge I used Wink of Stella on all the cards to add sparkle.

Hope you like the cards...

See you soon!


Saturday 9 August 2014

'Dream, then do!'

Hi everybody!

I'm so excited to share this card with you! I used a really cool CAS-ual Fridays stamp I won for being selected as a 'Favorite' in the challenge last month.

I made a card for the current CAS-ual Fridays Tic Tac Toe challenge... (I played along with the third column which is Sequins, Emboss and twine and also across which is Dots, white and sequins )


I heat embossed the vine from Casual Elegance stamp set in gold and silver, fussy cut it and added to the card. Used twine to highlight the sentiment.

Thanks for dropping by!

See you!